How to Create Raised Stencil Designs With Artisan Enhancements VP Antico
Want to add some dimension and interest to your next paint project? Artisan Enhancements VP Antico gives you the ability to create raised stenciled designs with smooth or textured finishes on just about any painted surface. Once dry these designs become an extension of your piece, ready for further transformation.
We have used one of our favorite stencils to create a finish with VP Antico to show how easy it is to apply a raised stencil relief and to inspire you to take the process a few steps further. Follow along as we share the techniques used to create unique finish and be inspired to experiment with some of these ideas on your own!

Having the right tools at hand makes all the difference in the world when creating a raised stencil design. Our mylar stencils are sturdier than your average stencil making them ideal for pushing a thicker product through. The Flowering Branch Stencil is 12 x 16 and ideal for adding interest to dressers, buffets and art pieces. The Color Shaper tool smooths the product over the stencil beautifully. It really makes this process a breeze!

Unless you’re confident in your stenciling ability and have a very steady hand, it’s always a good idea to use painters tape to hold your stencil in place. We wouldn’t want any stencil movement to interfere with a clean design.
Once your stencil is in place, scoop up a bit of product onto your color shaper and smooth it right over the top of your stencil. Continue to do this until the stencil is completely covered.

Don’t worry too much about visible lines in the product or perfectly even application. If perfect and smooth is the look you hope to achieve, VP Antico can be lightly sanded smooth once dry!

This is a beautiful raised stencil design as it is. If we wanted to stop here, we could simply allow the product to dry completely and seal this piece with Clear Topcoat Sealer.

Be sure to scrape any excess product from your stencil right away and return it to your container for future use! A baby wipe or damp cloth then works well to clean any VP Antico residue from your stencil.

While the product is still wet, consider using a small paintbrush to add some additional texture to the design as we’ve done here. This will give your piece a more custom, handmade look.

For this piece we decided to do some detailed painting of the stenciled design. This was done once the VP Antico had dried completely. Dry time varies depending on how thickly the product has been applied. A hair dryer works well to speed things along if you’re anxious to keep working.

Laying the stencil back down over the design made detail painting fast, easy and precise. We used the Artisan Enhancements stencil brushes to paint the dogwood design in Scandinavian Pink. Pure White, Versailles and French Linen.

Again, we could have stopped here and sealed this raised stencil design as it was, but a couple more steps would take it to another level of artistic complexity and how could we resist?

We applied a thick coat of Crackle Tex across the whole board, painting it on in a horizontal direction with our round brush. It is important to pay attention to the direction in which the Crackle Tex was applied in this case because the application of the next layer of paint in the opposite direction is what created an almost geometric, dramatic crackle. Applying the Crackle Tex and final paint layer in the same direction will result in a more linear crackle, while stippling will give you a spiderweb like finish.

As soon as the Crackle Tex had dried, we quickly painted one thick coat of Old White vertically over the entire board.

Within a few moments, fine lines and cracks began to appear.

While the paint was still damp, we used a sea sponge and the pull-off method to remove some of the Old White paint from the raised stencil design and the surrounding areas.

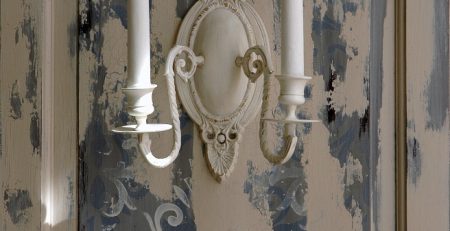
Once we were satisfied with the pull-off and had left the best most dramatic crackled areas as they were, we dabbed a small amount of French Linen onto the raised stencil areas and then wiped it back with a damp cloth to create a subtle shadowed effect.

Happy with our completed, dry, 3 dimensional paint finish, we applied a thin coat of Clear Topcoat Sealer for protection.

We hope you will try your hand at creating a raised stencil design with VP Antico! Please hashtag #artisanenhancements when you share photos on social media of your finished projects! We love to see the imaginative ways that people use our art finishing products on painted furniture, home decor pieces, art canvases and more!