


Old World Patina Paint Finish Tutorial

When we recently came across this image on Pinterest, we knew these rustic candle sticks would be great inspiration for an Old World patina paint finish!

We gathered together several new, mismatched candlesticks and set out to give them that elegant, rustic, Old World appeal!

After painting each candlestick with a base coat of varying shades of grey and white, we opened up our quart of Leaf & Foil Size.

For this paint finish, we wanted the metallic accents to be random and hap-hazard, almost as if they were flaking off. Rather than apply Leaf & Foil Size over the entire surface, we used a small brush to apply a light coat in various areas.

Approximately 15 minutes after the application of Size, we were ready to burnish foil onto those tacky areas.
This is an excellent time to pull out any small scraps of foil you may have leftover from previous Leaf & Foil projects!
We like to use a small cleaning brush to burnish the shiny side of the metallic foil. On the candlesticks painted in grey tones, we used silver foil to accent.
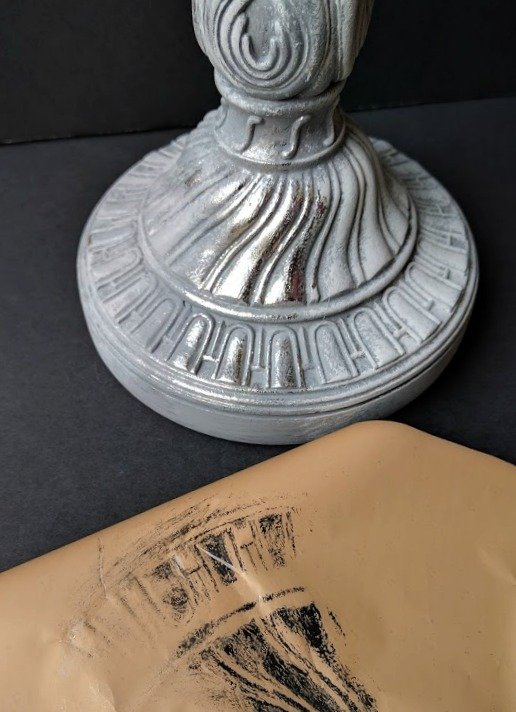
Nothing beats the immediate gratification of metallic foil finishes achieved with Artisan Enhancements™ Leaf & Foil Size!

Referring to our Pinterest photo for inspiration, we accented the white candlesticks with Copper Foil.

Upon completion of our metallic foil applications, we turned to Easy Crackle for the texture that would be needed to achieve an Old World effect.
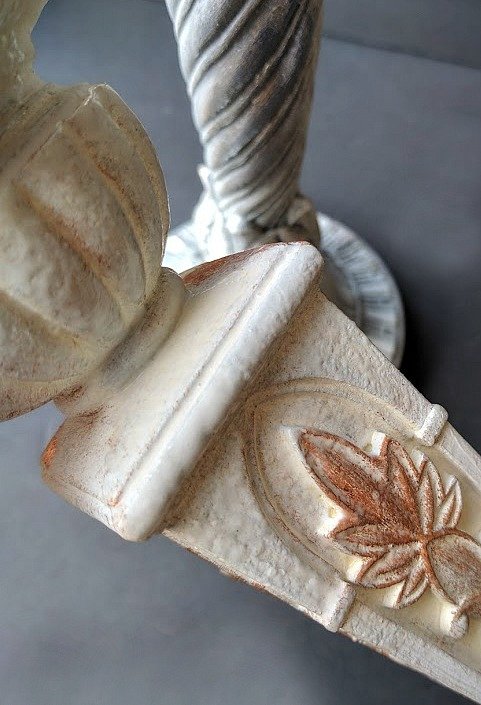
We applied the Easy Crackle liberally but not evenly, sometimes covering even the metallic accents.

After a couple of hours, the Easy Crackle had dried completely and we were ready to move onto the next step. We grabbed two of our round brushes along with some Pure White and Graphite. One brush would be used only for white, while the other would be used for mixing and applying varying shades of grey achieved by combining the two paint colors.

As we randomly stippled different paint colors onto the candlesticks, we also blotted and wiped it away with a damp, lint-free cloth. Where Easy Crackle had been applied, a rougher texture appeared as we worked the surface, creating that patina look we were after.

From here on out, it is simply a matter of layering and playing with the application and removal of paint until you are satisfied with the look you’ve achieved. It’s never too late to add more Leaf & Foil Size or Easy Crackle. Just refer back to that specific step in the tutorial and be sure you give the product the appropriate amount of dry time before proceeding.
Once we were happy with our paint finishes and they were completely dry, we were ready to choose a sealer to protect our work from wear and tear. We chose to use Artisan Enhancements™ Clear Finish for our candlesticks because it is formulated for keeping whites white and it would also add a bit of sheen that would enhance the metallic accents. We used our 45mm Topcoat Brush to apply a thin, even coat of Clear Finish to each candle stick. We followed up with a second, final application of the sealer 24 hours later.


The next time you come across a paint finish with a great patina that catches your eye, consider using it for inspiration in one of your own projects! Study the colors and textures that make it unique, then go to work recreating the look by layering different products and paint applications! Artisan Enhancements bio-based, low-no VOC art finishing products make it fun, easy and safe to create beautiful faux-finishes on furniture and accessories in your home!
We encourage you to pin this tutorial for future reference and share the inspiration with your friends! Please remember to hashtag #artisanenhancements when you share your projects on social media! We love seeing your creative endeavors!


