Side Table Makeover with Faux Marble and Metallic Foil Effects
Jim stumbled upon a charming side table that was a perfect candidate for a makeover! While the piece had a sturdy build, its old-fashioned baby blue paint and discolored varnish were in need of a refresh. In this tutorial, Jim shares his expert techniques and tips for creating a beautiful faux grey marble paint effect and a sleek metallic silver foil finish.
Supply List
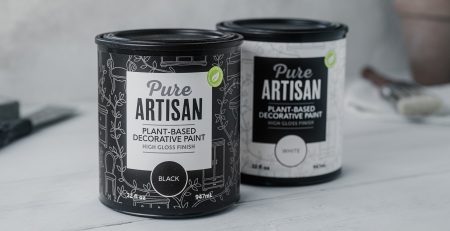
- Pure Artisan Black and White Gloss Paint
- Micro Brush (For Painting)
- Scumble Glaze
- Large piece of newsprint or Kraft Paper (make sure ink doesn’t bleed if the paper is printed)
- Large Dry Soft Brush to diffuse and soften faux veins
- Small Artist brushes for veining effect
- Pencil with eraser or blending stump (optional)
- Sandpaper for Distressing (100 – 220 grit)
- Artist Brushes for Foil and Antiquing Details
- Leaf & Foil Size
- Silver Foil
- Nature’s Wood Stain Roasted Pecan Wood Stain
- Artisan Enhancements Sealers
- Brushes for Sealing
STEP ONE
Surface Preparation
The end table needed a light dusting, wipe down, and hardware removed to get started. Before applying paint, always make sure surfaces are free of cleaner residue, dust, dirt, and debris.
STEP TWO
Stir Paint and Create Custom Color Mix
Stir Pure Artisan™ Gloss Paints from the bottom up before every use.
For this table, Jim created a custom mix of Pure Artisan Gloss Paints. The ratio Jim is using is approximately 50/50 (half Black + half White). We recommend creating your mix and testing on a sample piece until the desired shade of grey is achieved.
STEP THREE
Apply Paint
Using the Artisan Enhancements Micro Brush, apply a smooth even layer of the custom mixed grey Pure Artisan gloss paint. Our Micro Brush is great for creating an ultra-smooth paint finish and glides across curved edges effortlessly.
After the first coat is completely dry, apply a second coat for full coverage. For optimal results, allow each coat to dry 12-24 hours before applying additional coats or effects.
STEP FOUR
Creating the Faux Marble Top Frottage and Glaze Effect
Create a Scumble Glaze using 3-Parts Scumble Glaze Medium + 1-part White Pure Artisan Gloss paint.
For this effect, Jim is using a classic faux finish technique called “frottage”. The simplified explanation of a frottage effect is to rub paper or parchment into wet glaze to develop a mottled effect.
Apply the tinted Scumble glaze mixture to the tabletop using a micro brush. While the glaze mixture is still wet, use crumpled newsprint or craft paper to create the frottage effect. Rub the paper across the surface lightly to lift excess glaze. Pull back the paper, then use a dry brush to soften the effect for a more diffused cloud-like finish. Allow this layer to dry overnight for best results.
Once the frottage layer has dried, apply a thin slip layer of UNTINTED Clear Scumble medium to the surface. A slip slayer acts as a temporary barrier between the first layer of frottage glaze and additional glaze effects. The slip layer allows more fluid like glaze effects to be layered.
While the slip layer is still wet, apply additional soft brush strokes of the Scumble + White paint mixture to create faux veins and variations often found in natural marble. Jim also uses a pencil eraser to create little imperfections in the veining which would be present in real marble.
This technique does take a bit of patience and practice. So, you might want to try on a sample piece first!
Once you’re happy with your Marbling effect, allow the Scumble glaze a full 24 hours to dry. For best results, allow 48 hours to make sure all layers of glaze are completely dry.
We recommend sealing glaze effects before moving on to the next layers. If the surface is accidentally exposed to paint or moisture, glaze effects can reopen and bleed. So, the best practice is to seal the glazed surface before moving on to the next step or do the glaze effect last before sealing the piece.
Any Artisan Enhancements sealers work great with Scumble effects. For this technique and to give the appearance of honed Marble finish, Clear Finish in Matte was used. Alternatively, Clear Finish in Gloss for a polished marble look could be applied.
STEP FIVE
Add Paint Distressing
On the base of the table and drawers, using Med-Fine sandpaper (100 – 220 grit) lightly distress the paint, revealing hints of the original baby blue base layer. Focus on areas that would likely naturally distress over time. Go slow with light to medium pressure. Careful not to go too deep through the layers of paint.
STEP SIX
Add Silver Foil Accents
To enhance the finish even further, Jim added silver foil accents. Apply Leaf and Foil Size to details, hardware, and carvings. Apply the Leaf and Foil Size using smaller art brushes for a more precise application to specific areas.
Allow the Leaf and Foil Size to completely dry and become tacky before applying metallic foil.
Apply the Silver metallic transfer foil (shiny side up) to the tacky Leaf and Foil Size. Using a soft cloth and a light touch pressure, rub the foil into the details and carvings. Gently peel back the clear plastic film of the foil, revealing the metallic coating transferred to the surface.
To learn more about basic foil applications check-out our blog post: How to use Leaf and Foil Size – Basic Application
STEP SEVEN
Add “Antiquing” with Nature’s Wood Stain
Jim lightly applied Roasted Pecan Nature’s Wood Stain to the piece to knock-back some of the “newness” and shine of the foil, paint, and marble effect. The stain was applied to specific areas with a brush or sea sponge, then wipe back or softly brushed to create a time worn effect.
STEP FIVE
Seal
Ideally the faux marble top would have already been sealed before applying Foil and Stain effects. If not, seal the top first to protect glaze effects.
While Pure Artisan Paint and Nature’s Wood Stains don’t necessarily require an additional sealer, any area that received a foil effect should be sealed.
Leaf & Foil Size will remain tacky if left unsealed. Jim used Clear Topcoat Sealer in Satin. Clear Finish in Matte can also be used.
Allow the entire piece to dry at least 1 week before use to protect the finish.
Thanks for following along <3
To learn more about our products visit your local Artisan Enhancements retailer, review tip sheets, and visit FAQ section.
Think Safer. Think Sustainable. Think Pure Artisan™ 🌍💚
Follow Us:
https://www.instagram.com/artisanenhancements
https://www.tiktok.com/@artisanenhancements