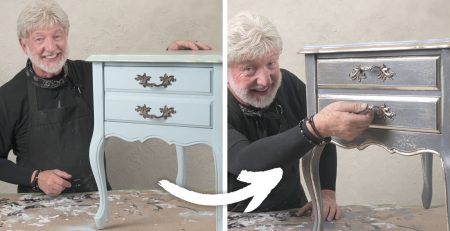
Painted Furniture Image Transfer with Transfer Gel
Create a painted furniture image transfer with Artisan Enhancements™ Transfer Gel, a superior water-based acrylic image transfer medium and varnish.
Transfer Gel is a translucent fibrous gel image medium used to transfer commercially or laser printed materials. Great for a variety of interior projects such as: furniture, cabinetry, decorative arts, and walls.
Basic Technique Application – Reverse Image Transfer Application
A true reverse image transfer using Transfer Gel is a great technique if you are trying to achieve an “antiqued” image reproduction. The image actually sits on the Transfer Gel rather than below the sealed surface. A true image transfer is not intended to give you a perfect “copied” look.
Supply List
- Artisan Enhancements™ Transfer Gel
- Artisan Enhancements™ 37mm Flat Brush
- Color Shaper or Plastic Spreader tool
- Commercially printed or laser printed/copied reverse image
- Spray Bottle with Mist
- 220 – 500 Grit Sandpaper
- Artisan Enhancements™ Clear Finish or Clear Topcoat
STEP ONE
Surface Preparation
Surfaces should be free of cleaner residue, dust, dirt, and debris. Surfaces should be dry before Transfer Gel application. For this tutorial our surface has been painted in a light Chalk Style paint. Make sure the basecoat of paint is completely dry before application of Transfer Gel. For best results let painted or stained surfaces dry overnight before Transfer Gel application.
Note: Raw, stone, and untreated surfaces may need to be sealed with Artisan Enhancements™ Clear Topcoat prior to painting and Transfer Gel application. These types of surfaces absorb too much of the medium resulting in a bad transfer to the surface. Additionally, some paint formulas re-open readily with the reintroduction of moisture which can lead to muddy and accidental paint stripping during the paper removal stage. If you’re concerned about the paint re opening, seal the painted surface with Artisan Enhancements™ Clear Topcoat prior to Transfer Gel application.
STEP TWO
Prepare the Image
Images to be used with Transfer Gel should be printed/copied using a commercial or laser printer. Ink Jet and water-soluble inks are not recommended. If using original artwork, photography, or water-soluble ink: Make mirrored laser copies of the original works to be used with Transfer Gel techniques. If copying or printing an image, a 24-28 lb. paper is a good paper stock thickness. If the paper is too thin, it can get too saturated with the Transfer Gel medium and occasionally tear during application.
STEP THREE
Stir Transfer Gel.
Transfer Gel is a thick bodied medium. Make sure to stir from the bottom up before every use – Do not shake. Shaking creates air bubbles in the gel medium which can be transferred to the surface causing undesired results. If bubbles appear while stirring, allow the bubbles to completely settle before application.
STEP FOUR
Apply the Transfer Gel.
Use the Artisan Enhancements™ 37mm Flat Brush or a high-quality varnish brush to apply a liberal but even coat of Transfer Gel to the face of the image paper/printed material (the image should be mirrored). The paper may curl up slightly after the Transfer Gel has been applied. Lay the image paper/printed material face (image side) down on to the painted surface. Use a flexible but sturdy smoothing tool, such as a Color Shaper or plastic spreader, to adhere the image paper/printed material to the surface. Using the smoothing tool, continue to smooth the paper to eliminate possible air bubbles and excess Transfer Gel trapped between the surface and the paper.
Allow the image to dry on the surface a full 24 hours minimum. Trying to remove the paper backing too soon could result in removing too much of the image. For best results allow image to dry 72 hours before removal.
STEP FIVE
Remove Paper Backing.
Remove the paper backing pulp. After a minimum 24 hours dry time, lightly sand the dry image with an ultra-fine 220-500 grit sandpaper. Use very light pressure, only a couple passes to get the paper started are needed. A spray mist bottle with a fine mist setting is a must-have for reverse image transfers. Mist the paper lightly to moisten the paper fibers. Removal of excess paper can be done by hand or with a sponge. We recommend starting with your fingertips. Gently use your fingers to rub and peel the paper pulp. If desired, you can graduate to a clean damp sponge to roll away more of the paper backing.
Note: The image is actually sandwiched between the face of the paper and sits on the Transfer Gel. Avoid excessive rubbing and removal of the image paper/printed material. If you try to remove every fiber of paper you will eventually remove the image. The image is actually on a thin layer of paper. Overworking could result in the image being accidently removed from the painted furniture image transfer, or accidently distressing the painted finish below the image. Keep in mind a reversed image transfer is not intended to give you a perfect “copied” look. If you accidentally remove some of the image, embrace it.
Allow the exposed image to completely dry before sealing.
STEP SIX
Seal.
Seal with Artisan Enhancements™ sealers Clear Finish or Clear Topcoat (See Sealer Tip Sheets for application instructions).
Bonus Tip: Wax, Nature’s Wood Stain, or Scumble maybe used over surfaces with Transfer Gel Image Transfer applications. To add an additional layer of wax, Nature’s Wood Stain, or Scumble first seal the transferred image surface with one thin coat of Clear Topcoat sealer. After 72 hours of dry-time, additional colored waxes/Nature’s Wood Stain/Scumble can be layered over the Clear Topcoat sealed Transfer Gel Image Transfer surface.
Thanks for following along <3
To learn more about Transfer Gel and creating a painted furniture image transfer, visit your local Artisan Enhancements retailer, review tip sheets, and visit FAQ section.
Follow Us:
https://www.instagram.com/artisanenhancements
https://www.tiktok.com/@artisanenhancements