

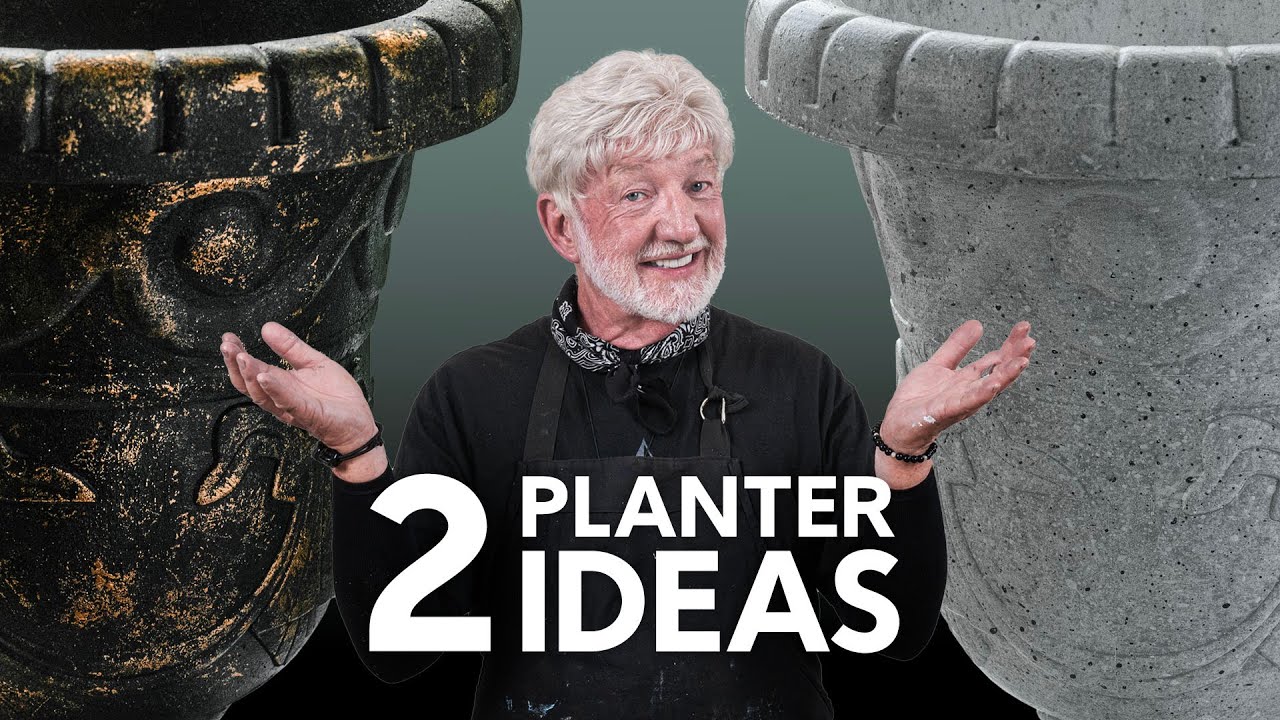
One Planter, Two Looks: Expert Tips for Transforming a Dull Plastic Planter
Have you ever experienced the frustration of finding the perfect piece to fit your home décor? We certainly have! After hours of searching, it might be time to pull out your paint brushes and get creative!
With some paint, the right tools, and a bit of imagination, you can transform unappealing mundane plastic planters into chic and custom home accents. Whether you’re reusing old planters or buying a brand-new planter, our Artisan Enhancement products and Pure Artisan Paints allow you to effortlessly create a distinctive finish.
In this tutorial, Jim transforms uninspired plastic pots into something inspiring, showcasing two distinct styles for the same planter in a simple step-by-step guide. Next time you can’t find the perfect planter, give one of these DIY techniques a try!
Supply List
- Pure Artisan™ Paint in Gloss Black
- Pure Artisan™ Paint in Gloss White
- 37mm Flat Brush – For Painting
- Artisan Enhancements™ Scumble
- Mixing Cup
- Clean mixing tool (such as a wooden tongue depressor)
- Measuring Spoons
- 25mm Round Brushes – Scumble and Detail Application
- Sea Sponge or lint free shop rag for blending
- Artisan Enhancements™ Leaf & Foil Size
- Chip Brushes or Inexpensive Round Brush
- Artisan Enhancements™ Foils in Copper
- Artisan Enhancements™ Sealers
- Artisan Enhancements™ Clear Finish Gloss or Clear Topcoat Gloss
STEP ONE
Surface Prep
Jim is using new two molded plastic planters. Often, molded plastic items have visible seams where the two side of the form have been connected by the manufacturer. To conceal the seam, Jim opted to shave back the seam edges with a putty knife and smooth with a bit of sanding paper. The curve of some the planter’s molded edges and rim were also lightly sanded to give the appearance of being well worn rather than newly manufactured.
If reusing old planters, make sure to clean the planters, clean-up any rough spots and prime if needed before painting.
Before applying paint, always make sure surfaces are free of cleaner residue, dust, dirt, and sanding debris.
STEP TWO
Shake & Stir
Always shake and stir liquid products before use. With the lid firmly secured and closed, shake the containers of Pure Artisan™ Paint. Open container, then stir from the bottom up before use. Allow all bubbles to settle before application.
STEP THREE
Application ~ Let’s Get Painting!!
Planter 1 – White Gloss
Using our 37mm Flat Brush, Jim applied one coat Pure Artisan™ Paint in White Gloss. Depending on the desired effect and surface you’re covering, 1 – 3 coats of White Paint maybe needed for full coverage.
Although Jim got good coverage with the first coat, once the first coat was dry, he applied a second coat. Jim will be applying a Scumble Glaze to the white planter. With this in mind, when he applied his second coat of paint, he used a stippling technique to achieve more texture in the paint which will be accentuated by the glazing.
Planter 2 – Black Gloss
Using our 37mm Flat Brush, Jim applied one coat Pure Artisan™ Paint in Black Gloss. Depending on the desired effect and surface you’re covering, 1 – 2 coats of Black Paint maybe needed for full coverage.
For the Black Planter, Jim will be applying a layer of metallic foil. Jim decided to apply the second coat of Black Paint again with 37mm Flat Brush in order to achieve a nice smooth base layer for the foil application.
Word of advice, if a second coat is needed, make sure the first coat is dry before applying additional coats. For optimal results, allow each coat of paint to dry overnight before applying additional coats of paint or additional effects.
STEP FOUR
Adding Glaze & Stone Effects to White Planter
Before adding, paint to Scumble, be sure to stir the Scumble medium from the bottom up.
To add dimension Jim applied a glaze effect. Jim created a custom Scumble Glaze by mixing – 6 Tbsp of Scumble, 3 Tbsp of Pure Artisan™ Paint in White Gloss, and a couple drips of Pure Artisan™ Paint in Black Gloss. The custom glaze was applied using our 25mm Round Brush. While the glaze was still wet Jim wiped back the excess and worked the glaze into the details with lint free cloth.
The create more detail and develop a faux stone effect, Jim applied a paint splatter effect. A splatter effect can be accomplished in a variety of ways. For this project, Jim uses a dry 25mm Round Brush to dip into the Black Gloss Paint. Then he off loaded the excess, pinched the tip of the bristles, and flicked paint droplets on to the surface of the planter. The same process was repeated with the White Gloss Paint until the desired finish was achieved.
To learn more about basic Scumble techniques check out our blog post, Scumble Glaze Basics.
STEP FIVE
Adding Foil Accents to Black Planter
Metallic Foils are one of the quickest ways to transform a plain object. To elevate the black planter, Jim added Copper Metallic Foils.
To get started, stir the Leaf & Foil Size carefully. Leaf & Foil Size is very STICKY as it dries. If you’re using a non-disposable tool to stir, like a spoon or paint palette knife, wash the tool immediately after stirring before the Size dries. Tools will stick to surfaces once the Size dries.
Stir from the bottom up before every use – Do not shake. Shaking creates air bubbles in the Size adhesive medium which can be transferred to the surface causing undesired results. If bubbles appear while stirring, allow the bubbles to completely settle before application.
For this project, Jim is using a 25mm Round Brush to apply the Leaf & Foil Size in a clouded stipple. A clouded stipple application leaves void of unfoiled areas for more interest and depth. Reminder, if you’re using a nice or non-disposable tool to apply Size, wash the tool immediately after application to remove stick Size and residue. If the Size becomes stubborn, a bit of rubbing alcohol may help the removal process.
Leaf & Foil Size is clear once dry and full tack in approx. 45 minutes.
Jim applied the foil to the dry, tacky, Leaf & Foil Size, face side or SHINY SIDE UP. Next, using light pressure, Jim used his hands to rub the foil across the surface of the planter. The pressure ensures good adhesion of the metallic coating to the tacky surface.
Gently peel back the clear film of the foil, revealing the metallic coating transferred to the surface.
To learn more about basic foiling techniques check out our blog post, How to Leaf & Foil Size.
STEP SIX
Seal
Pure Artisan Paint is an all-in-one (paint + sealer) product, on its own the paint does not require an additional sealer before use. However, since effects have been layered over the paint, we recommend sealing the effects layers.
If left unsealed, Scumble can reopen and bleed when exposed to moisture. For planter one with the Scumble Effect, we recommend sealing with Clear Finish in either Gloss or Matte. Reminder, Scumble and Clear Finish are recommending for interior applications.
Unsealed Size can remain tacky indefinitely, becoming a magnet for unwanted dust, dirt, and debris. For the Foil effects, either Artisan Enhancement sealer can be used. However, since the Copper foil has more of a matte/dusted finish a matte sealer maybe preferred.
Check out our sealer FAQ to see which sealer works best for you – Sealer & Topcoat FAQ Page
For best results and cure times, let the paint dry for 1 -2 weeks before use.
THE FINAL RESULTS
Before

AFTER – Which look is your favorite?

Thanks for following along <3
To learn more about our products visit your local Artisan Enhancements retailer, review tip sheets, and visit FAQ section.
Follow Us:
https://www.instagram.com/artisanenhancements
https://www.tiktok.com/@artisanenhancements
https://www.facebook.com/ArtisanEnhancements
https://www.pinterest.com/artisanenhancements
Think Safer. Think Sustainable. Think Pure Artisan™ 🌍💚
THE FINAL RESULTS
Which look is your favorite?
Think Safer. Think Sustainable. Think Pure Artisan™ 🌍💚


